Discover expert solutions for leak sealer for roof in 2026 Learn about types application steps innovations costs and maintenance for long lasting protection
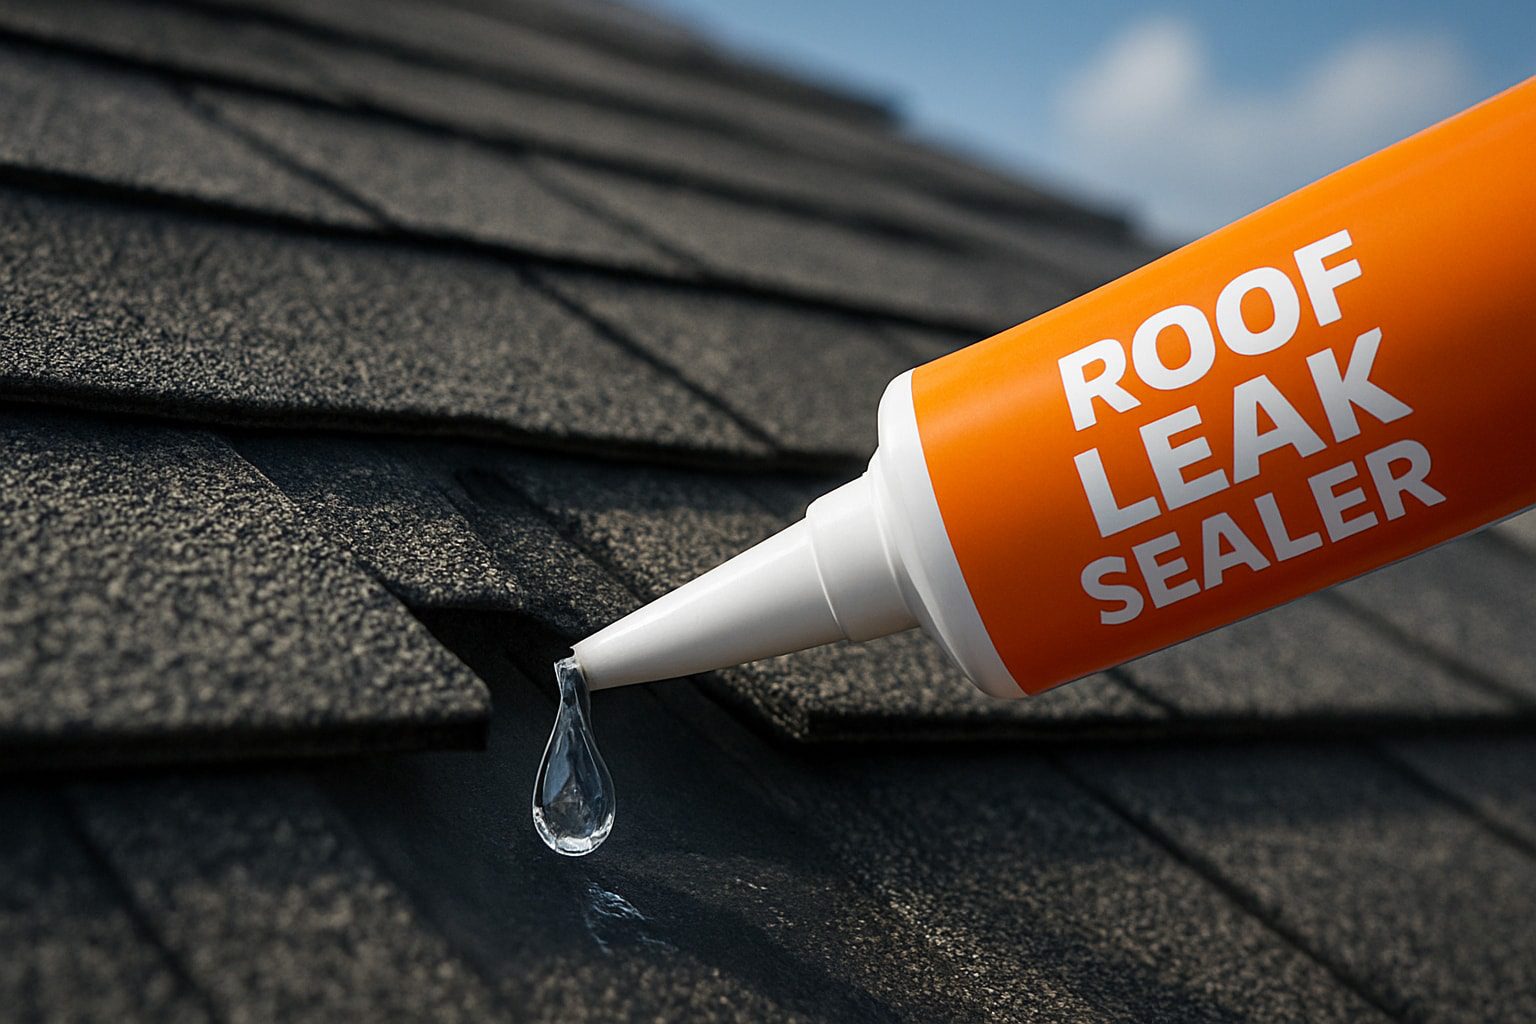
A leaking roof can quickly turn from a minor annoyance into a costly catastrophe. Each year, property owners face unexpected repairs and financial stress when small drips are ignored.
This guide is designed to help you find the best leak sealer for roof protection in 2026. With new technologies and expert insights, you will gain the knowledge needed to prevent damage and secure your property.
Inside, you will discover the latest types of sealers, step-by-step application methods, innovative solutions, cost-saving tips, and proven maintenance strategies. Take control of leaks before they escalate and safeguard your investment with confidence.
Understanding Roof Leaks and Their Impact
Roof leaks can develop from a range of issues, but the impact is almost always costly and disruptive. Choosing the right leak sealer for roof problems starts with understanding why leaks occur and how quickly they can escalate if left untreated.
Common Causes of Roof Leaks
Several factors contribute to roof leaks, and knowing these can help you choose the best leak sealer for roof protection:
Weather Damage: Heavy storms, hail, and high winds can compromise roofing membranes and materials.
Aging Materials: Over time, shingles, membranes, and seals deteriorate, making them vulnerable.
Faulty Installation: Poor workmanship or shortcuts during installation often lead to premature leaks.
Clogged Gutters and Drainage: Blocked water flow can cause pooling and seepage.
Penetration Points: Areas around vents, chimneys, and skylights are frequent leak sites.
Industry reports indicate that over 40% of commercial roof leaks are due to membrane failures. This statistic highlights the importance of regular inspection and timely application of leak sealer for roof longevity.
Consequences of Unaddressed Leaks
Ignoring a minor leak can have serious repercussions for property owners and businesses:
Structural Damage: Water intrusion weakens decking and framing, leading to costly repairs.
Mold Growth: Persistent moisture fosters mold, posing health risks and complicating remediation.
Energy Loss: Damaged insulation results in higher heating and cooling bills.
Interior Damage: Ceilings, walls, and flooring often suffer visible staining and deterioration.
Business Disruption: Leaks can force closures or product loss, especially in retail environments.
For example, retail stores have reported inventory losses and damaged displays due to unchecked leaks. These scenarios reinforce why selecting the most effective leak sealer for roof applications is a proactive investment.
Identifying Leak Locations
Recognizing leak sources early can significantly reduce repair costs. Look for:
Visual Signs: Water stains, bubbling paint, and damp insulation are common indicators.
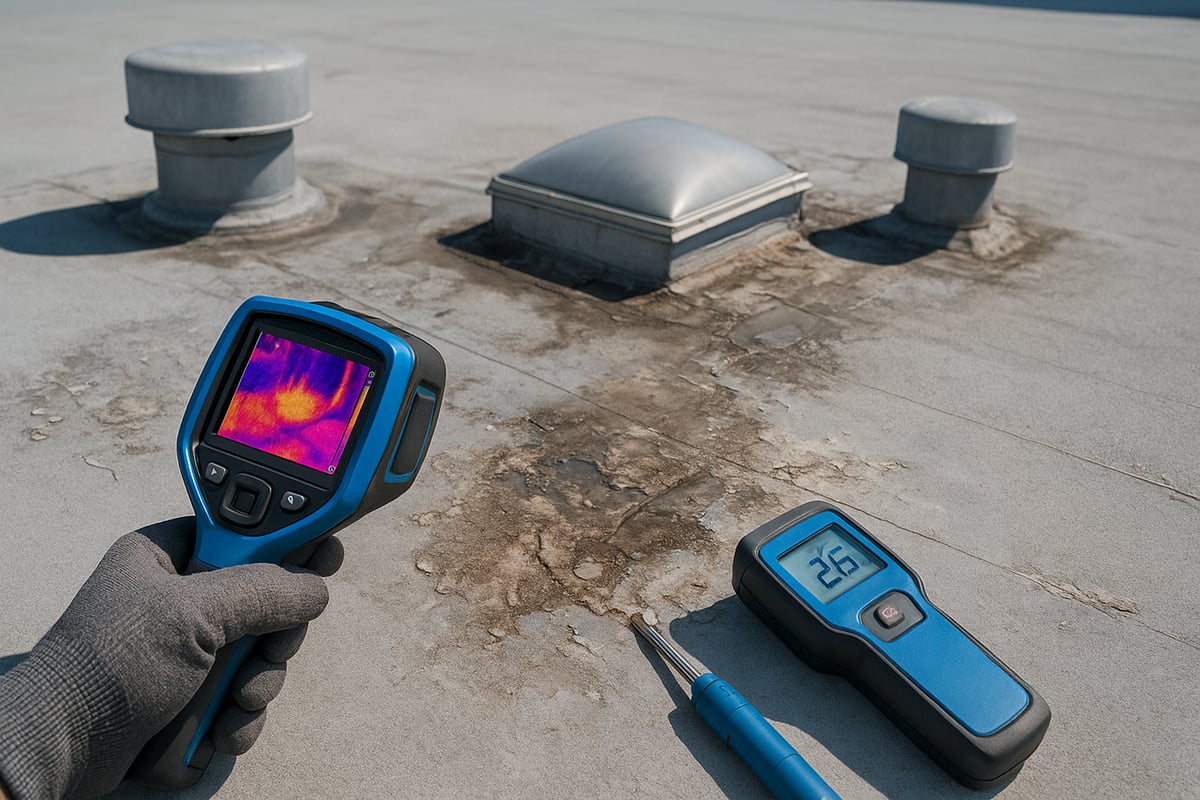
Moisture Meters and Infrared Tools: These technologies detect hidden moisture and help pinpoint leaks.
Professional vs. DIY: While some property owners perform basic inspections, professionals use advanced tools for accurate results.
According to industry statistics, early detection can reduce repair expenses by up to 60%. For more in-depth guidance on identifying leaks, explore Roof leak detection methods to understand the latest professional techniques. Quick action and the right leak sealer for roof issues help prevent escalating costs and damage.
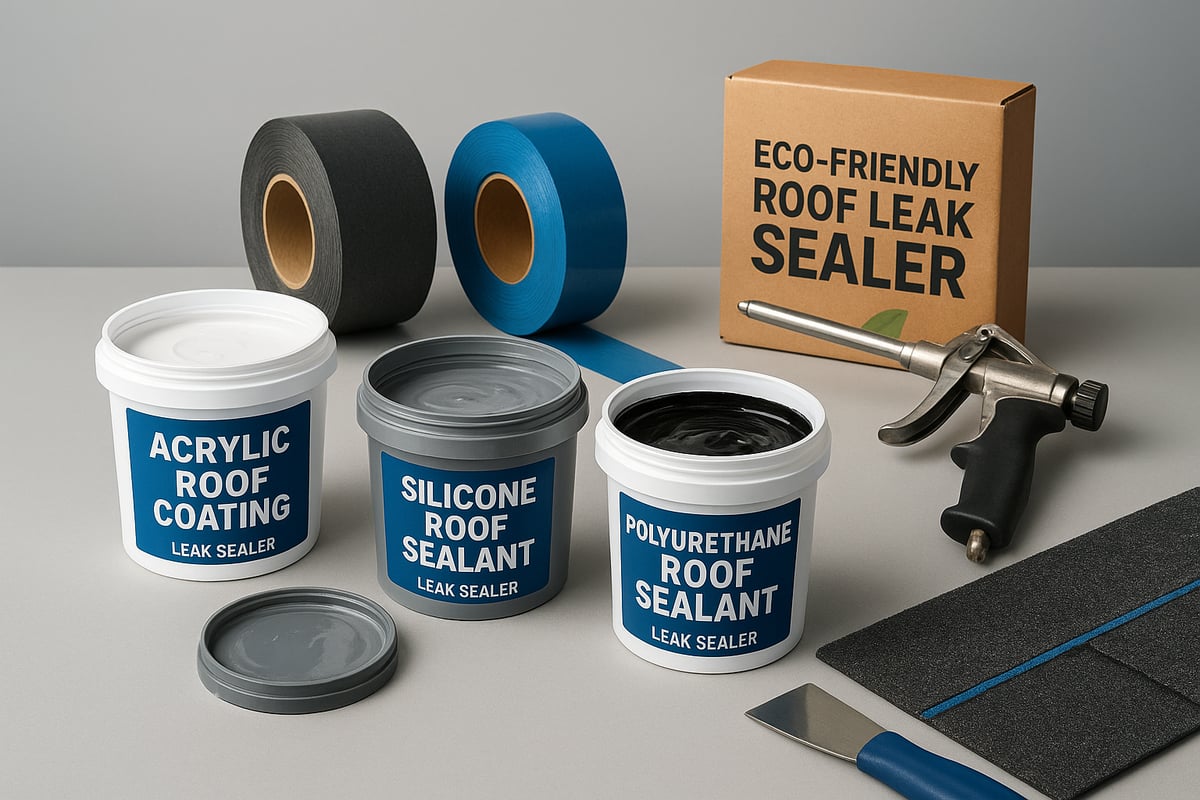
Types of Leak Sealers for Roofs in 2026
Choosing the right leak sealer for roof projects in 2026 means understanding the wide range of technologies available. Today's solutions combine proven chemistry with innovative features, delivering longer-lasting, more reliable protection. Let us walk through the leading options to help you make an informed decision for your property.
Liquid-Applied Sealers
Liquid-applied sealers are a top choice for many property owners seeking a leak sealer for roof issues. These products include acrylic, silicone, polyurethane, and new hybrid formulas, each offering seamless coverage and flexibility. Acrylics are known for quick drying, while silicones provide superior UV resistance and longevity.
Silicone coatings, for example, can last up to 20 years with proper application. Liquid-applied sealers work best on flat or low-slope roofs, forming a continuous membrane that resists ponding water and temperature fluctuations. For a comprehensive overview of available coatings and their benefits, see this Commercial roof coatings guide.
Tape and Patch Systems
Tape and patch systems provide a fast, effective solution for small leaks or seam repairs. When you need a leak sealer for roof penetrations, butyl and EPDM tapes stand out for their strong adhesion and weather resistance. Modern tapes in 2026 feature advanced adhesives and UV-stable backings, ensuring durability even in harsh climates.
Application is simple: measure, cut, and press the tape over the damaged area. These systems are ideal for joints, flashing, and minor punctures, offering a quick fix when time is critical.
Spray Foam Sealers
Spray foam sealers, specifically closed-cell polyurethane foam, address both insulation and leak prevention. As a leak sealer for roof assemblies, spray foam expands to fill gaps and cracks, creating an airtight, watertight barrier. This dual function improves energy efficiency and reduces the risk of future leaks.
The popularity of spray foam in commercial roofing has grown by 15% from 2024 to 2026, reflecting its effectiveness in both new construction and retrofit projects. Proper application requires specialized equipment, but the results can be long-lasting and robust.
Cementitious and Bitumen-Based Sealers
Cementitious and bitumen-based sealers remain valuable for emergency and temporary repairs. When a rapid leak sealer for roof emergencies is needed, these products offer affordability and ease of use. Cementitious sealers are water-based and harden quickly, while bitumen-based options provide a sticky, waterproof layer.
However, these traditional sealers may not match the longevity or flexibility of newer solutions. They are best reserved for short-term fixes or as a stopgap until a more permanent repair is possible.
Eco-Friendly and Smart Sealers
Sustainability and innovation drive the latest developments in leak sealer for roof technology. Low-VOC, bio-based, and recyclable formulations minimize environmental impact without sacrificing performance. In 2026, self-healing materials and nanotechnology have become more accessible, with nano-sealers able to close micro-cracks automatically.
For example, nanotech-infused coatings respond to stress and minor damage, extending the life of your roof. These options are ideal for property owners seeking green building certifications or enhanced durability.
Compatibility with Roofing Materials
Selecting the right leak sealer for roof applications depends on compatibility with your roofing material. Metal, TPO, EPDM, and asphalt each require specific sealers to ensure proper adhesion and performance. Using an incompatible product can void warranties or lead to premature failure.
Always consult manufacturer recommendations and consider factors such as roof slope, climate, and existing warranty terms. Matching the sealer to your roof type delivers the best results and long-term peace of mind.
Step-by-Step Guide: How to Apply Leak Sealer for Roofs
Applying a leak sealer for roof protection is a straightforward process when you follow expert guidance. Proper preparation and attention to each step are crucial for achieving a long-lasting, watertight result. Below, you will find a detailed, easy-to-follow guide divided into clear stages.
Preparation and Safety Measures
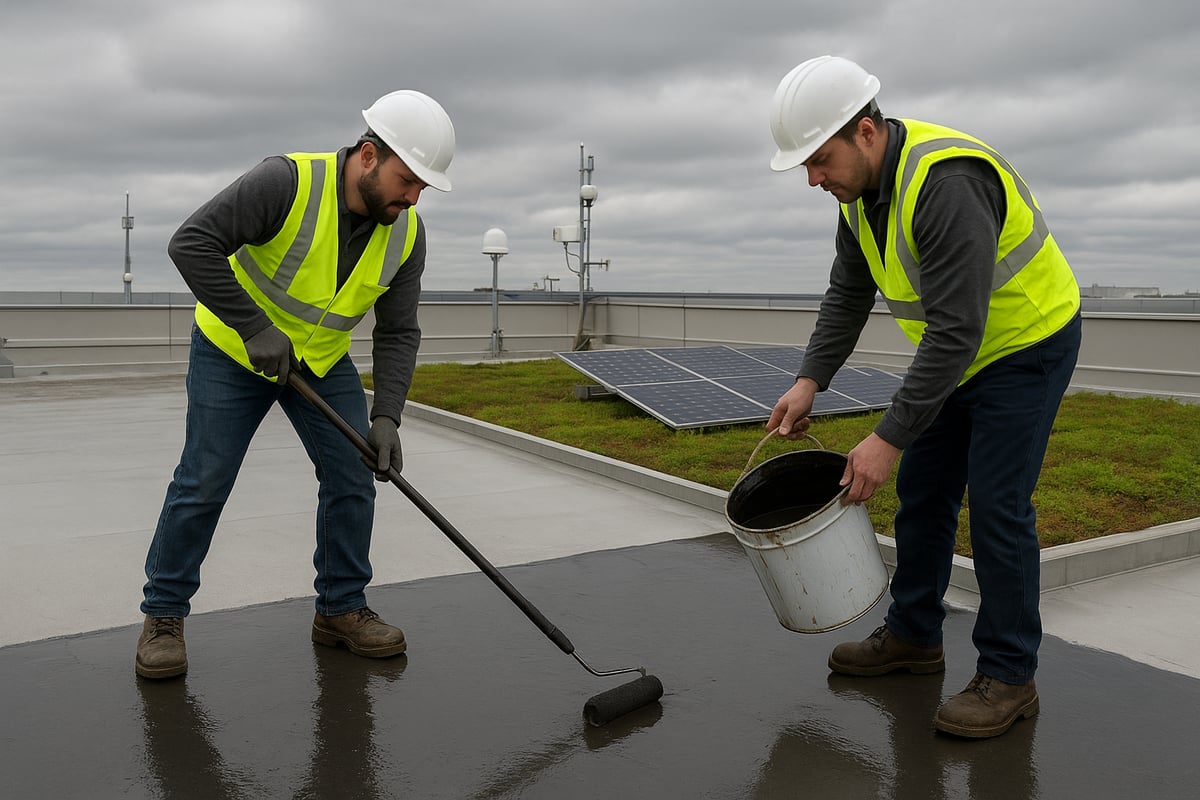
Start by gathering all necessary equipment before working with any leak sealer for roof projects. Safety should be your top priority. Equip yourself with a harness, non-slip footwear, gloves, and eye protection. Make sure the weather is dry and wind conditions are manageable to avoid accidents.
Inspect the roof for loose debris, fallen branches, or unstable surfaces. Clear walkways and ensure your ladder is secure. If you are unsure about working at heights, consider professional help. For urgent repairs, consult Quick roof leak repair tips for actionable advice.
Prepare all tools in advance: brushes, rollers, sprayers, cutting tools, and cleaning materials. Organizing these will help you apply leak sealer for roof repairs efficiently and safely.
Surface Preparation and Leak Identification
Thorough surface preparation is essential to ensure the leak sealer for roof adheres properly. Begin by locating all sources of leaks. Use visual clues such as water stains, bubbling paint, or damp insulation. For greater accuracy, consider moisture meters or infrared technology.
Once you identify leak areas, remove debris, moss, dirt, and any old sealant. Use a stiff brush or pressure washer for stubborn materials. The surface must be completely dry before application to prevent trapping moisture beneath the sealer.
Carefully check around vents, skylights, and seams. Missing even a small area can reduce the effectiveness of the leak sealer for roof applications, so be meticulous in your inspection.
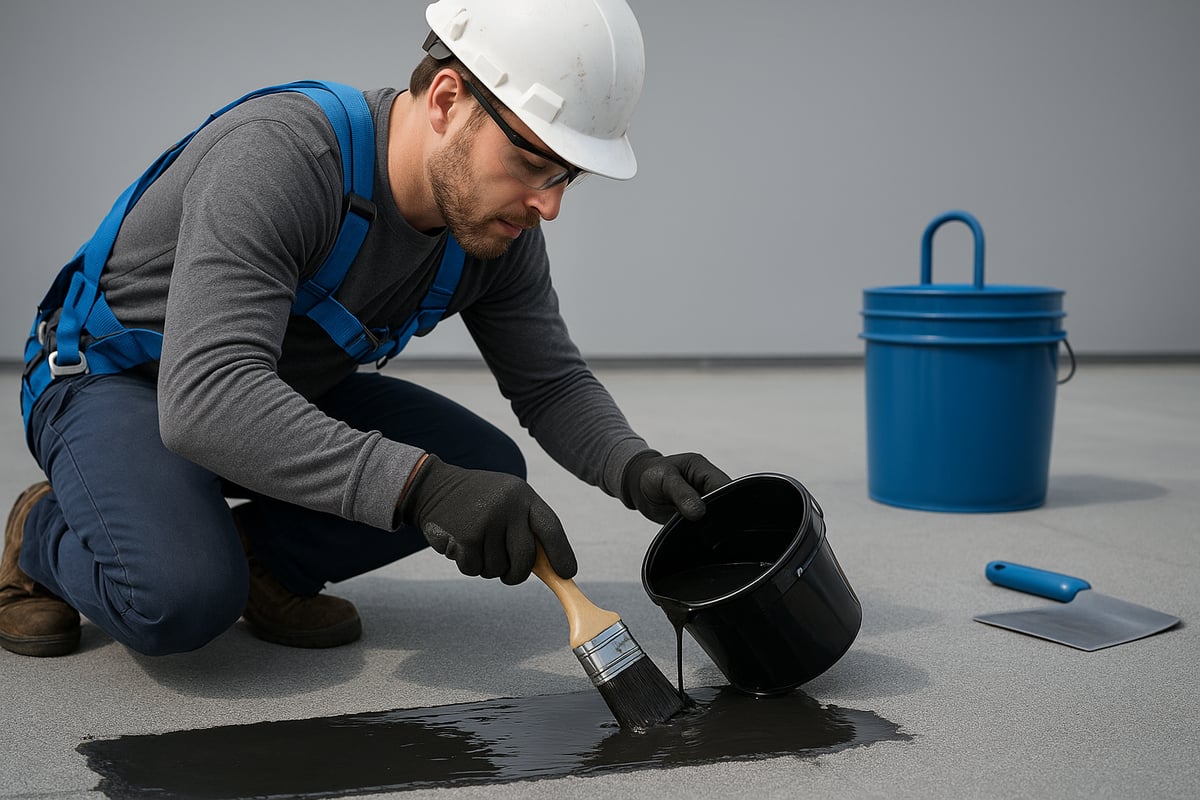
Application Process: Liquid Sealers
When working with a liquid leak sealer for roof protection, read the manufacturer’s instructions thoroughly. Some products require mixing or stirring before use. Pour the sealer into a tray if using a roller or brush, or load it into a sprayer for larger areas.
Apply the product in even strokes, maintaining a consistent layer. Overlap each pass to avoid missed spots. Aim for the recommended thickness, usually specified on the product label. Pay special attention to seams, corners, and areas around penetrations.
Allow the leak sealer for roof to cure as directed, which may vary based on temperature and humidity. Avoid applying during rain or extreme heat, as this can affect performance.
Application Process: Tape and Patch Systems
For targeted repairs, tape and patch systems are an effective leak sealer for roof solution. Measure the damaged area and cut the tape or patch to size, allowing extra for overlap. Clean and dry the area thoroughly, then apply a primer if recommended.
Peel off the backing and press the tape or patch firmly onto the surface. Use a roller or hand pressure to remove air bubbles and ensure full adhesion. Seal the edges carefully, especially around irregular surfaces.
These systems are ideal for seams, joints, or small punctures where a liquid leak sealer for roof might not be practical.
Quality Checks and Finishing Touches
Once you have applied your chosen leak sealer for roof, inspect the area closely. Look for thin spots, bubbles, or missed sections. If necessary, apply a second coat for added durability, following the recommended drying times.
Dispose of used materials and containers responsibly. Clean your tools immediately after use, as cured sealant can be difficult to remove. Double-check that all safety equipment is accounted for and stored properly.
A thorough inspection ensures that your leak sealer for roof application provides the best possible protection against future leaks.
Post-Application Monitoring
After applying leak sealer for roof protection, wait the recommended period before exposing the area to rain. Monitor the roof during and after the first rainfall to check for any signs of persistent leaks.
Establish a routine maintenance schedule to inspect the sealed areas regularly. Look for early signs of wear or new leaks, and address them promptly to maintain the effectiveness of the leak sealer for roof.
Keep a record of application dates, products used, and inspection results. This documentation will be invaluable for warranty claims and ongoing maintenance planning, ensuring your leak sealer for roof investment delivers long-term value.
Innovations and Trends in Roof Leak Sealers (2026 Outlook)
The year 2026 is shaping up to be a pivotal moment for the leak sealer for roof market. As roofing technology evolves, property owners and facility managers are seeing a wave of innovation that promises more reliable, sustainable, and intelligent solutions than ever before.
Smart Sealers and Self-Healing Technologies
One of the most exciting advancements in leak sealer for roof products is the rise of smart sealers featuring self-healing capabilities. These materials contain microencapsulated agents that activate when cracks or punctures occur, automatically sealing new leaks before they escalate.
Commercial buildings in North America and Europe have begun pilot programs to test these smart sealers on flat and low-slope roofs. Early results show a significant reduction in maintenance frequency and repair costs. As industry adoption increases, smart sealers are quickly becoming a preferred solution for long-term leak protection.
Sustainability and Green Roofing
Environmental responsibility is now a driving force behind the development of leak sealer for roof products. Manufacturers are producing more bio-based, recyclable, and low-VOC sealers that meet strict sustainability standards.
Compliance with certifications such as LEED and BREEAM is a top priority for commercial properties, especially in healthcare and education sectors. Hospitals and schools are increasingly selecting green sealing products to reduce emissions and create safer environments for occupants. These trends indicate a clear shift toward eco-friendly roofing practices.
Enhanced Durability and Weather Resistance
2026 brings major improvements in the durability and weather resistance of leak sealer for roof products. New formulations provide superior UV stability and can withstand extreme temperature swings, reducing the likelihood of premature failure.
Extended warranties, now stretching up to 25 years, reflect growing confidence in these advanced solutions. For a closer look at cutting-edge developments in this space, see GAF’s Innovative Roofing Solutions at 2026 IRE, which highlights some of the latest products designed to outlast traditional options.
Integration with Roof Monitoring Systems
Another key trend is the integration of leak sealer for roof systems with smart roof monitoring technology. IoT-enabled sensors are now being installed alongside sealing products to provide real-time leak detection and moisture tracking.
These systems can trigger automated responses, such as activating additional sealing agents or alerting facility managers to issues before they become costly. By 2026, it is estimated that 30 percent of new commercial roofs will feature some form of integrated leak monitoring, making proactive maintenance more achievable.
Regulatory Changes and Industry Standards
The regulatory landscape for leak sealer for roof products is also evolving. Updated building codes emphasize energy efficiency and environmental safety, requiring contractors and manufacturers to comply with stricter certification standards.
Product certification and installer qualifications are now essential for warranty validity and insurance coverage. Staying informed about these changes is crucial for property owners seeking to maximize the value and longevity of their roofing investments.
Cost Considerations and ROI of Roof Leak Sealers
Understanding the costs and return on investment for a leak sealer for roof projects is essential for property managers and homeowners alike. Making smart choices now can prevent costly repairs and maximize your building's value in the long run.
Upfront Costs by Sealer Type
When budgeting for a leak sealer for roof, it's important to compare the initial investment across different products. Costs can vary significantly based on the type of sealer and the specifics of your roof.
Sealer Type
Average Cost Range
Best Use Cases
Liquid
$0.50–$2 per sq ft
Flat/low-slope, seamless
Tape
$1–$3 per linear ft
Seams, joints, small areas
Spray Foam
$2–$5 per sq ft
Insulation and sealing
Factors such as roof size, complexity, and material compatibility will also impact your overall spend.
Long-Term Savings and Value
Choosing the right leak sealer for roof can lead to significant savings over time. A high-quality product reduces the need for frequent repairs and extends your roof's lifespan.
For example, some advanced products like SmartSeal’s 50-Year Leak Prevention Sealant offer decades of protection, minimizing future expenses. Improved insulation from sealing can also lower energy bills, with some commercial buildings saving thousands annually.
DIY vs. Professional Application
The decision to apply a leak sealer for roof yourself or to hire a professional affects both cost and results. DIY can save on labor, but it requires the right tools, safety equipment, and experience.
Professional installation ensures proper coverage and may protect your warranty. For large leaks, complex roofs, or when compliance with manufacturer guidelines is needed, hiring a certified contractor is the better investment.
Warranty and Insurance Implications
Warranties for leak sealer for roof products differ by type and installer. Manufacturer-backed warranties often require professional application and proper documentation.
Insurance providers may offer discounts for proactive leak prevention, recognizing the reduced risk of water damage. Always check policy details to confirm eligibility for coverage based on your chosen sealer and installation method.
Calculating ROI
To determine the true value of a leak sealer for roof, calculate the return on investment by comparing upfront costs, ongoing maintenance, and energy savings against potential repair expenses.
Many property managers use simple formulas or digital tools to track these numbers. Reviewing case studies from similar buildings can also help set realistic expectations for payback periods and long-term savings.
Maintenance and Prevention Strategies After Sealing
Proper maintenance after applying leak sealer for roof is essential to extend your roof’s lifespan and prevent recurring leaks. Proactive care, combined with strategic inspections, ensures the effectiveness of your leak sealer for roof investment.
Routine Inspection Schedules
Establishing a consistent inspection schedule is the foundation of roof care. Aim for semi annual reviews and always check after major storms. Use a checklist to examine the leak sealer for roof areas, paying attention to seams, flashing, and previous repair spots.
Schedule inspections every spring and fall
Look for new stains or soft spots
Document findings with photos
Regular inspections help identify issues before they escalate, protecting both your property and investment.
Cleaning and Upkeep
Keeping your roof clear of debris is crucial for the longevity of your leak sealer for roof. Remove leaves, branches, and any obstructions from gutters and drains. Use gentle cleaning products that are safe for sealed surfaces, avoiding harsh chemicals that could degrade the sealer.
Sweep off debris after storms
Check for ponding water on flat roofs
Inspect for moss and algae growth
Proper cleaning prevents water buildup and maintains the seal’s integrity.
Early Detection of New Leaks
Promptly spotting new leaks is vital. Use visual cues like bubbling paint or damp spots, and consider advanced tools such as moisture meters or thermal imaging cameras. Leveraging Thermal Imaging for Roof Leak Detection can reveal hidden moisture, ensuring your leak sealer for roof continues to perform.
Early detection allows for immediate repairs, preventing costly structural damage.
Reapplication and Touch-Ups
Even the best leak sealer for roof products require periodic touch ups. Monitor for signs like peeling, cracking, or thinning of the sealant. Typical reapplication intervals range from 3 to 10 years, depending on the product and exposure.
Watch for color changes or loss of flexibility
Address minor issues promptly to avoid major repairs
Staying proactive with reapplication ensures ongoing protection.
Recordkeeping and Documentation
Maintaining detailed records is essential for warranty and insurance compliance. Keep logs of inspections, repairs, and product details. Utilize digital tools or apps to track maintenance history and set reminders for future checkups.
Store receipts and warranty information
Photograph each maintenance activity
Update records after every inspection
Accurate documentation streamlines claims and supports asset management.
Professional Maintenance Programs
Engaging in scheduled professional maintenance offers peace of mind and maximizes the effectiveness of your leak sealer for roof. Experts follow advanced protocols, use specialized tools, and are trained to spot problems early. According to Commercial roof maintenance strategies, facilities that invest in ongoing maintenance can reduce leak incidents by up to 70 percent.
Professional care ensures compliance with manufacturer recommendations and extends your roof’s service life.
Discover expert advice on metal roof leak sealer options for 2026. Learn to prevent costly leaks, choose top products, and apply solutions for lasting protection.
Master epdm roofing repair with expert 2026 solutions Learn to spot issues perform step by step fixes and extend your roof’s lifespan with proven strategies